The tilt shift effect adds a nice ‘miniature’ look to photos. There’s a good explanation of how it works over at Wikipedia. We’ll skip the technical details and simply move on to explain how you can create a fake tilt shift effect using the great drawing app for Mac called Sketch. I’ve recently switched from Adobe Fireworks to using Sketch only, and I was intrigued to see if I could create the fake tilt shift effect using Sketch also. Of course you can. Here’s how:
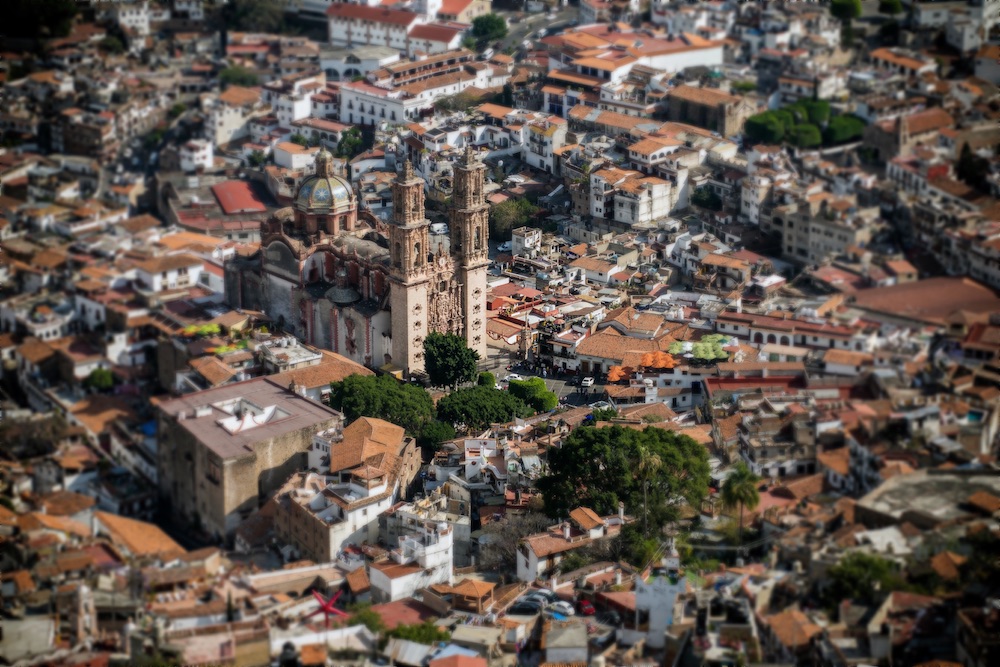
Get a nice photo to work with. I randomly selected Taxco de Alarcón, Mexico taken by Pedro Lastra.
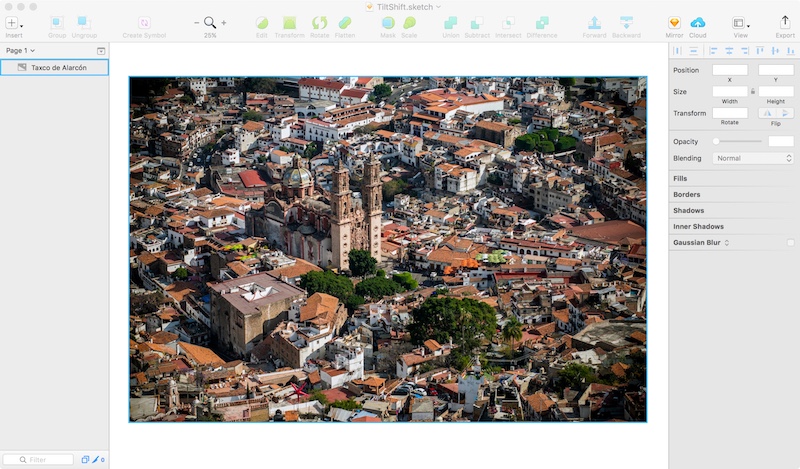
1 Start Sketch, and drag and drop the photo in Sketch. You can give the photo a better name by renaming it in the Layer List on the left.
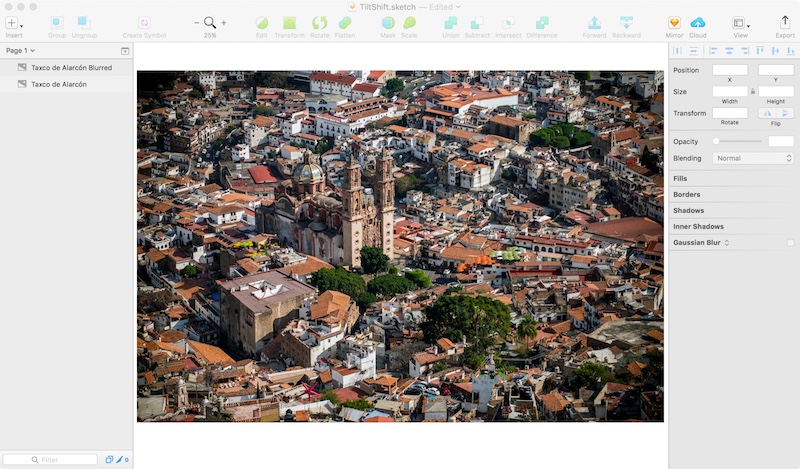
2 Select the photo in the Layer List (left hand pane), and hit Cmd+D (duplicate) to create a copy of it. I renamed the duplicate for clarification.
3 Apply a Gaussian blur to the top image, set it to 5px. This is done by selecting the image in the Layer List (left panel), then ticking the checkbox labelled ‘Gaussian Blur’ in the Inspector on the right.
4 Create a rectangle that has the same size and position as the original photo. Make sure it is on top of the two photos. Remove the border color (untick the checkbox), and change the fill color to be a radial gradient. Modify the location and size of the radial gradient (circle) so its center is in the center of the photo, and its outer edge roughly matches the size of the rectangle. The start (center) color should be white with an opacity set to 0, and the end (outer) color should be white with an opacity set to 100. You can choose any color you want, as long as both start and end color is the same.
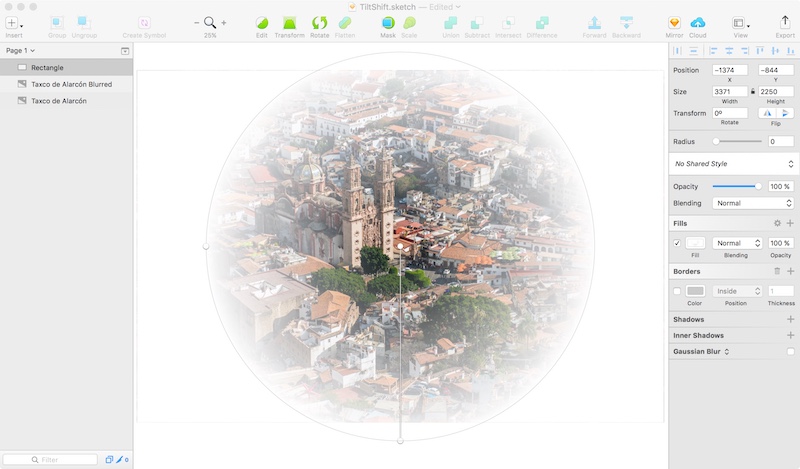
5 Select both the rectangle and the blurred photo in the Layer List on the left and click on the menu “Layer” -> “Mask with Selected Shape”.
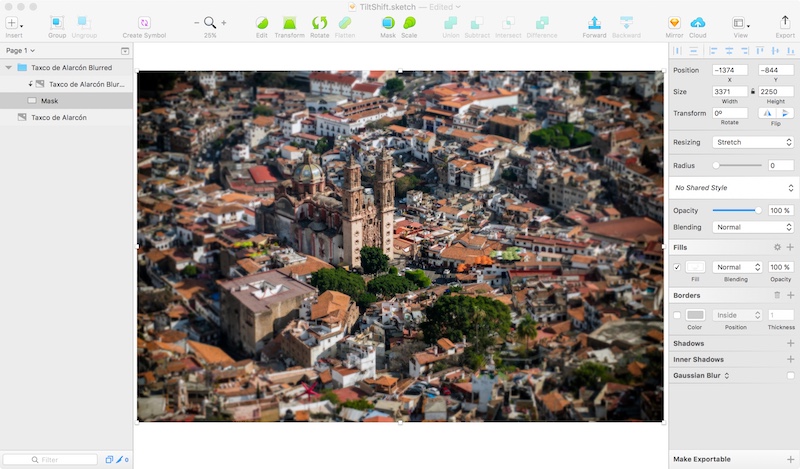
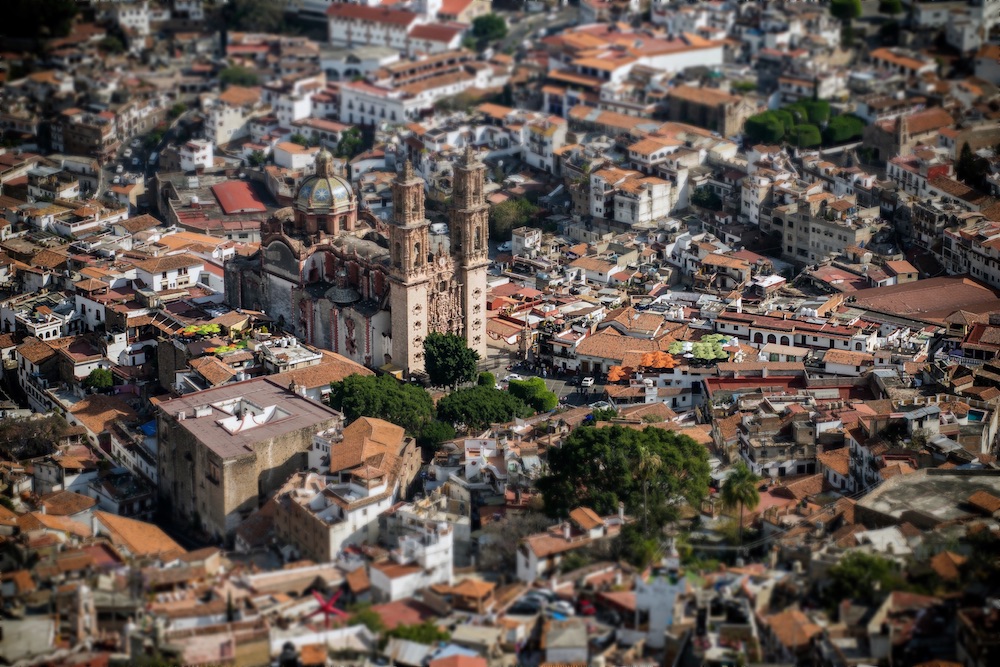
6 Voilá! You’re done. That was easy wasn’t it? Now for some pro tips: thanks to Sketch you can select the mask by expanding the newly created group in the Layer List and clicking on the layer named “mask”. Now you can change the gradient from radial to linear, to achieve a different tilt shift effect. Really smooth. Compare the two images below and see for yourself.